


Do you spend unlimited hours browsing different cute nail designs and wishing you could try some by yourself? However, do you have the enthusiasm and creativity to come up short on the direction to create flawless nails? Assuming you’re searching for cute nail ideas at home, you’ve come to the correct place! Here are astounding DIY nail design ideas followed by tips and deceives only for you.
Since ancient times, women have been painting their nails, and some proof of nail art has been found among the Incas of the fifteenth century. After liquid nail polish was introduced in 1907, the half-moon nail trim was born. From the 1920s to the 1940s, the half-moon nail treatment showed up in varieties of having the area close to the fingernail skin, and additionally, the tip of the nail left unpainted or colored in with various colors.
Nail art is seen from numerous points of view as a helpful release for ladies, helping them in general about themselves. It is additionally a type of self-articulation, and an illustration of the economic empowerment of ladies since most nail specialists are women. It is women who, as a rule, run the nail art salons.
Best DIY Nail Design Ideas
In case you are searching for an adventure in evaluating adorable and cute nail designs at home, then, at that point, this blog entry will be your stepping stone. Here’s the how-to-do nail design at home, bit-by-bit instructions included, to kick you off!
There are different parts engaged with nail art. Aside from a decent quality base coat and topcoat polish, you have your primary nail enamels, which can be textured, sparkle-based, attractive, etc. Black and white nail stains are used a great deal. Acrylic tones also are used in nail design ideas.
Nail art stickers with adhesive are applied to the nails, and a quick-drying topcoat of polish is applied over them. Shimmering rhinestones, confetti glitter (sprinkled with a fan brush on wet nail polish), sprinkle dabs (little metal or glass dots), studs, acrylic decals, flocking powder, and striping tapes that add metallic lines to nails are used in nail craftsmanship.
- A Colorful Splash
- Basic Floral Nails
- Peek a Boo Nails
- Gradient or Ombre Nail Art DIY Idea
- Dual Tone Nail Design Idea
- Kitty Cat DIY Nail Art Design
- Triangle Nail Art Design
- Attack of Heart Nail Art
- Fishnet Nail Design
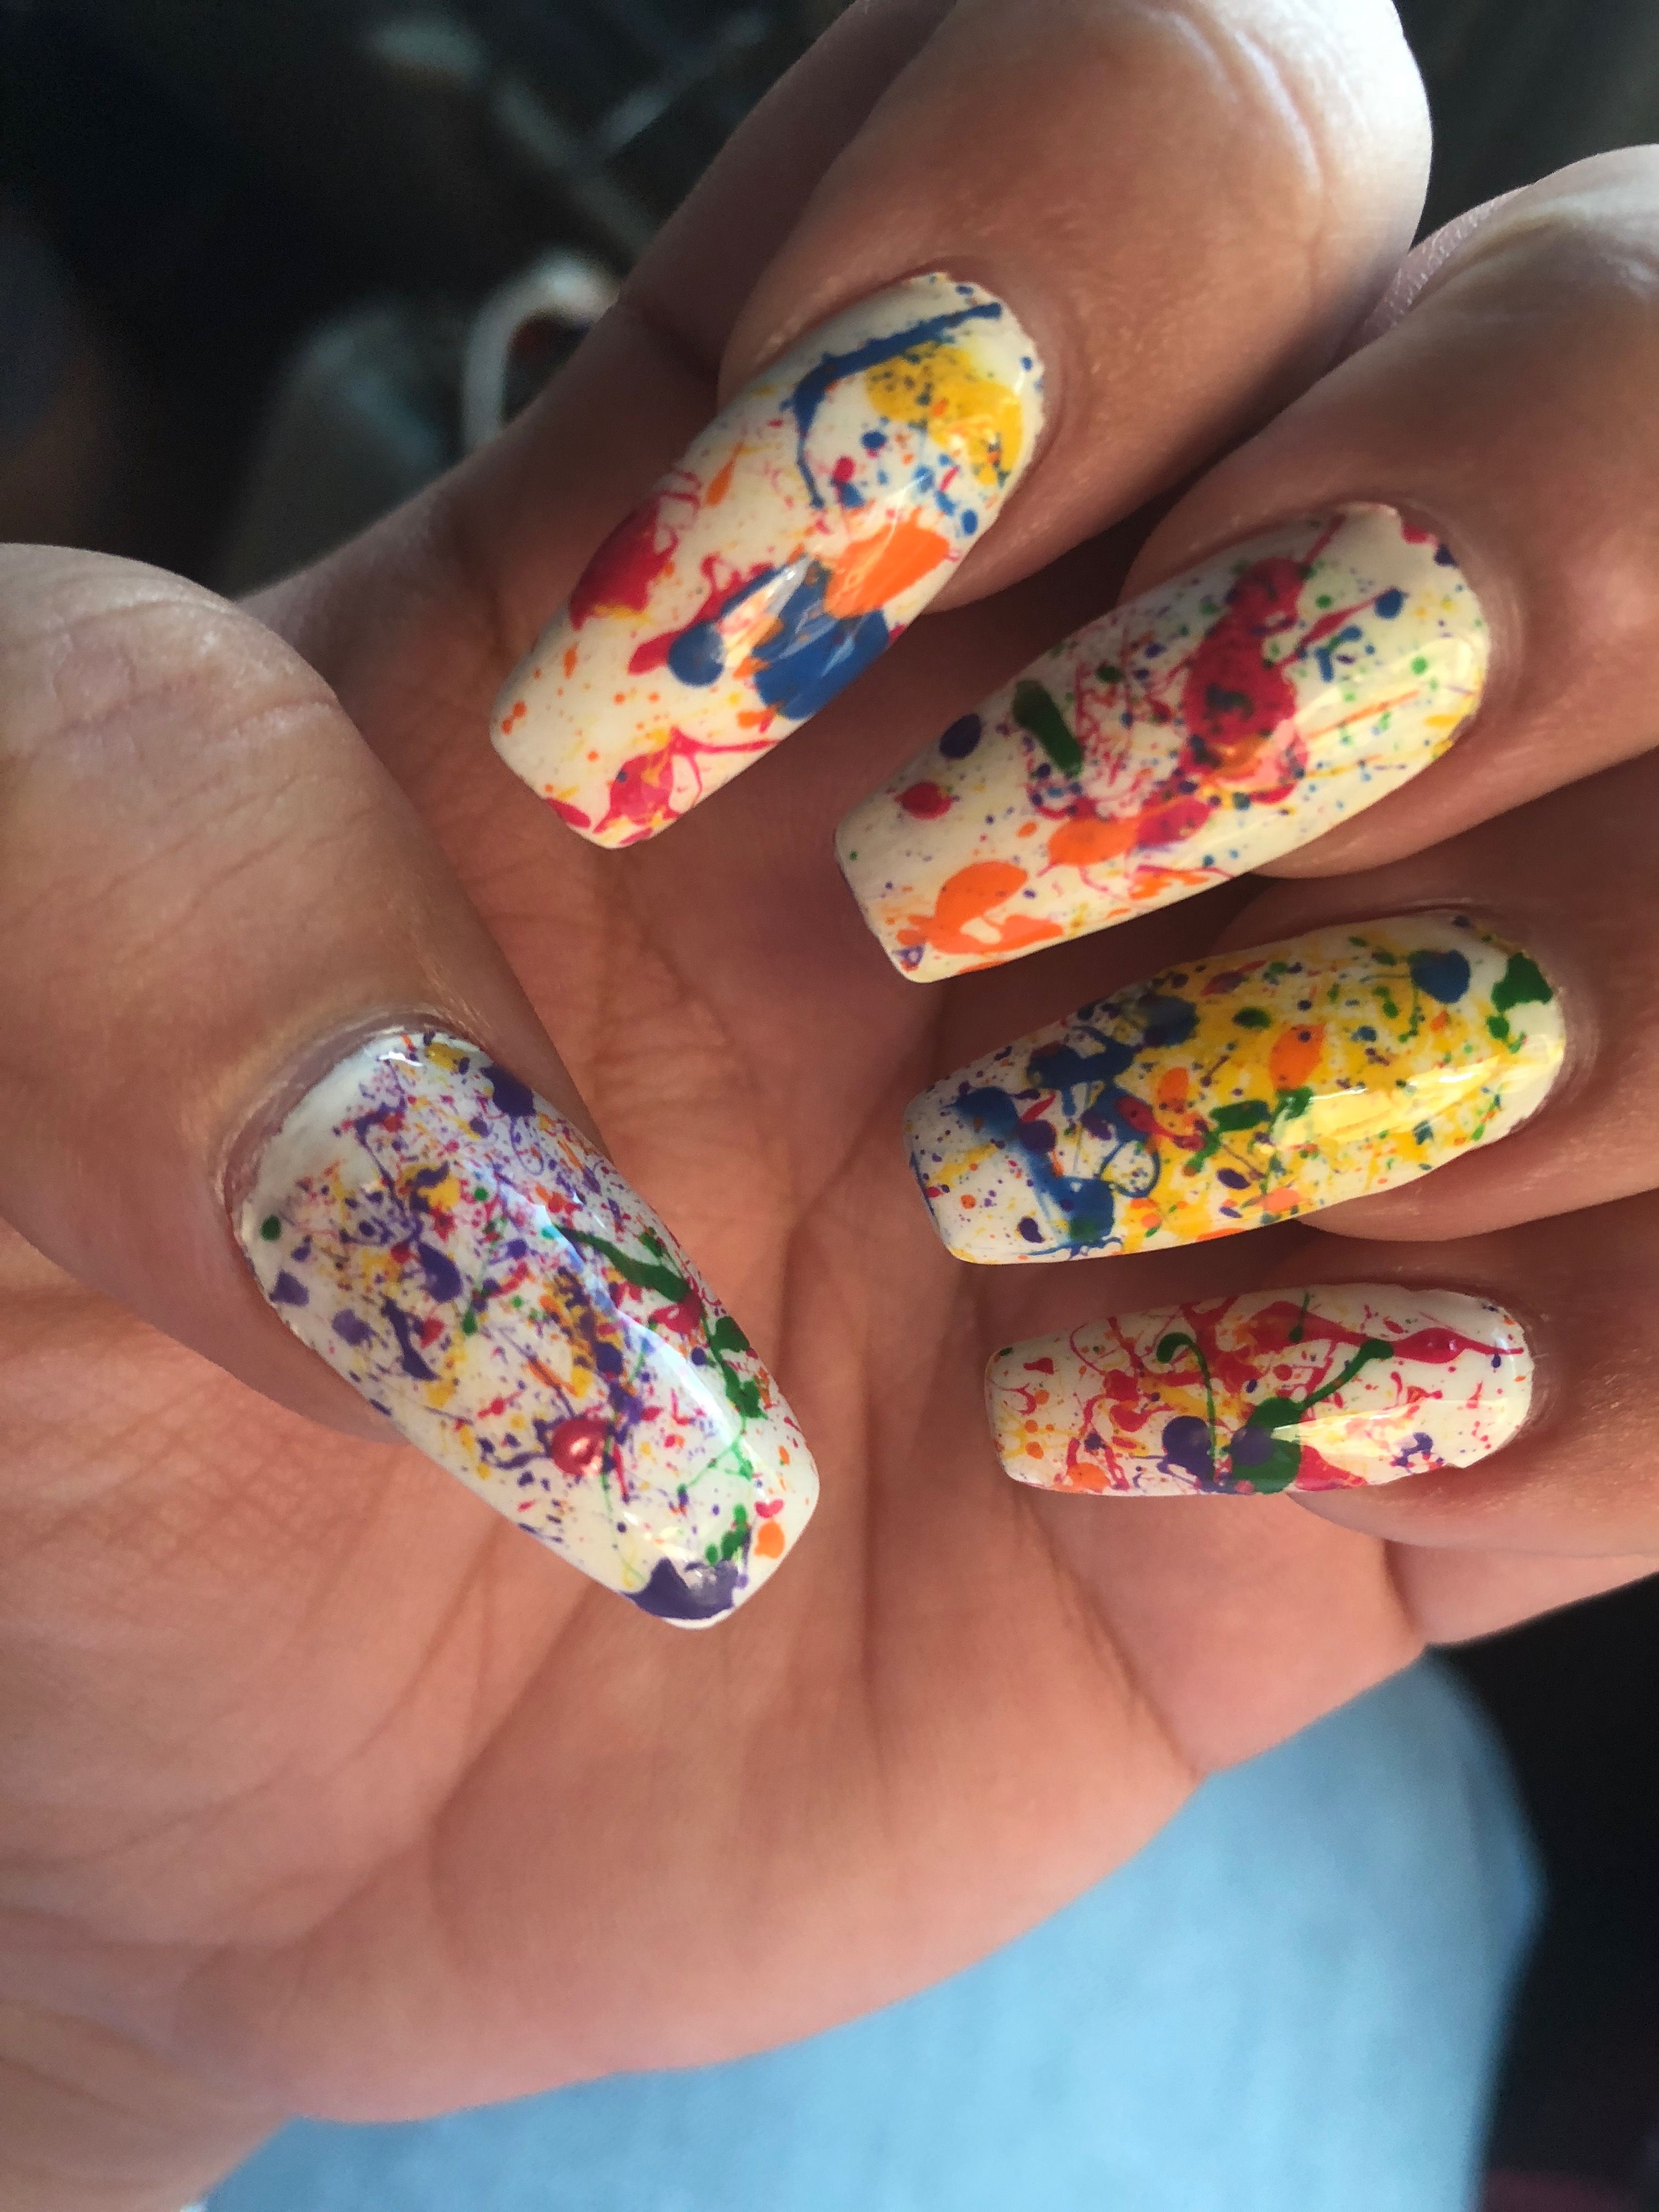
A Colorful Splash
This is, by a wide margin, one of the most straightforward nail design ideas at home without a kit, offering a stunning wrapping up. Each nail will have a remarkable pattern and will leave you mesmerized. You might remove the ends of a pair of elastic gloves and put them on to protect your hands.
Detailed Instructions:
- Start by applying a base layer of white nail polish. You might pick some other sober tone as a base according as you would prefer. Most people picked white as it helps different styles stick out.
- Get your hands on a firm paintbrush and dip it inside one of the colors. On the other hand, pour out some nail polish on a perfect surface and plunge the end of the toothbrush into the nail polish.
- Using your thumb or the pointer, solidly stroke the bristles away from the nails with the goal that the nail polish gets sprayed on the white base (It sounds like a wreck, yet it’s enjoyable!)
- Repeat step 2 for different tones until you have the ideal splattered effect.
- Dip a cotton swab in some nail polish remover and clean up the spaces around the nail.
- At long last, add a clear coat to seal in the nail art.
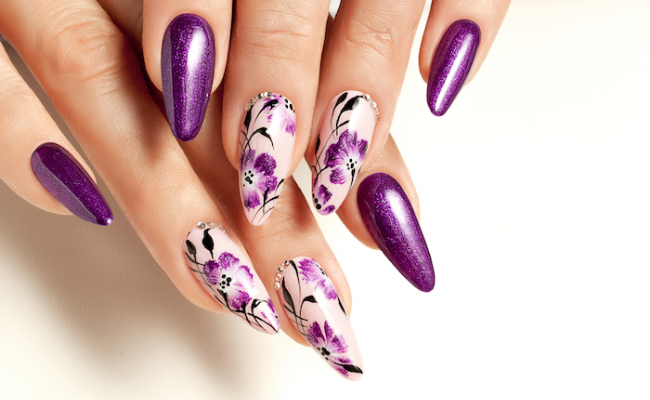
Basic Floral Nails
This is one of the most effortless Nail Designs Ideas thoughts, particularly if you love blossoms. This is an extraordinary method to welcome the Spring season. What is truly love about this plan is the unpredictable way it looks rather than the simple manner by which you can create it.
Detailed Instructions:
- Make a base by applying two layers of white nail polish. You can also use shades of turquoise and peach for colorful foundations.
- Dip the flimsy nail art brush in one of the two shades to create a blossom.
- Use the other shading to accentuate the bloom and add a touch of charm.
- You can even add enumerating like green leaves and yellow or dark flower places.
- Seal in the design by applying an unmistakable coat at the top.
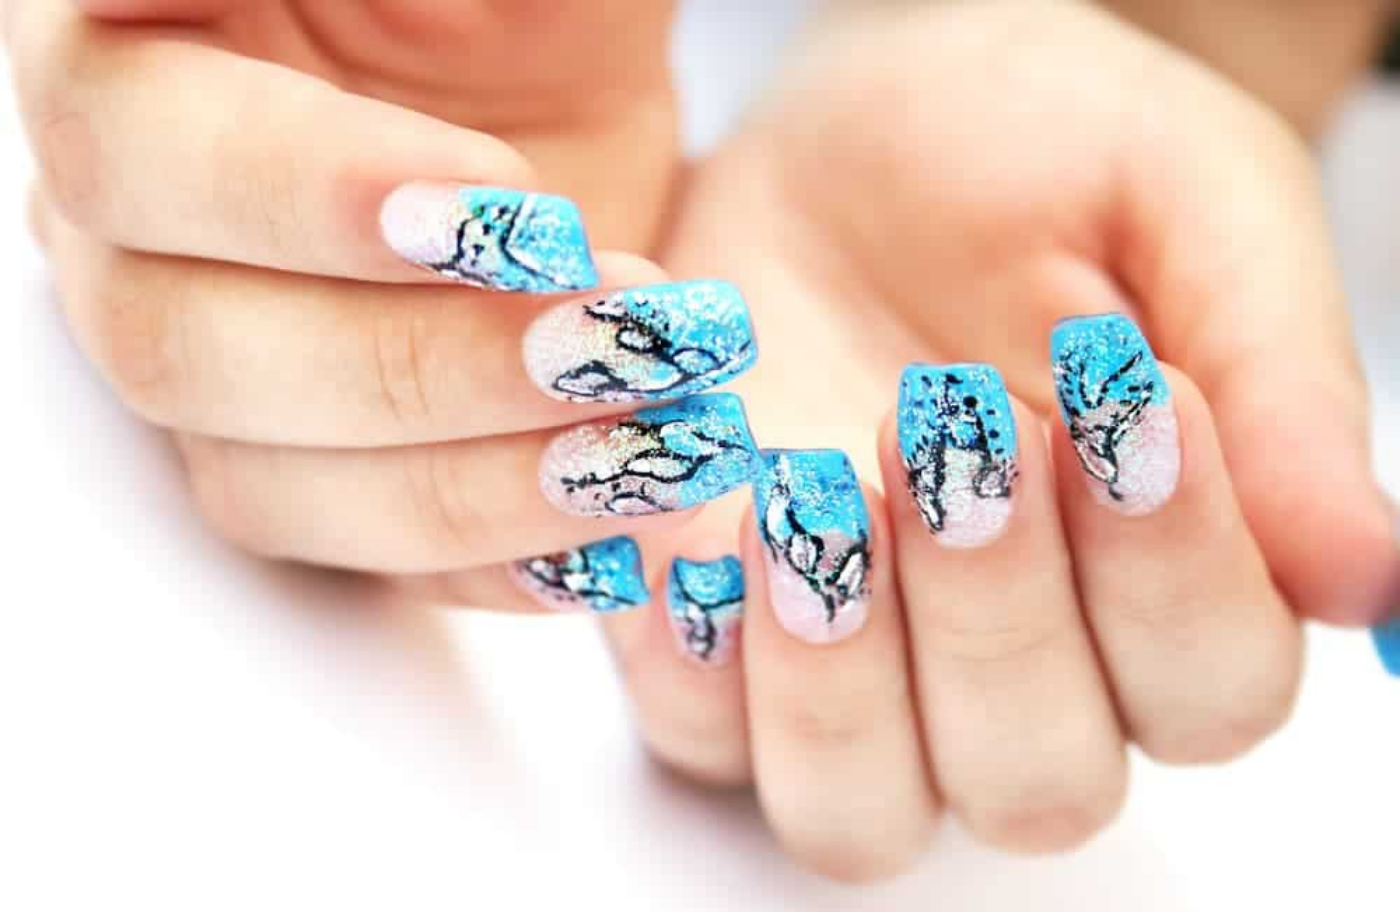
Peek a Boo Nails
Using nail art at home in a roundabout way implies that you needn’t bother with any extravagant equipment. This nail art is a savior for those searching for simple nail design ideas at home for beginners without tools. The example and texture offered would be classy and modern.
Detailed Instructions:
- Start by applying two layers of gold nail polish for the base. Allow it to dry.
- Apply a layer of the water nail polish, and keeping in mind that it’s wet, touch the wrinkled stick film or plastic wrap over the nail.
- You will get a splendid final look at a variety of water and gold.
- Apply the last layer of clear nail polish for the wrapping up.
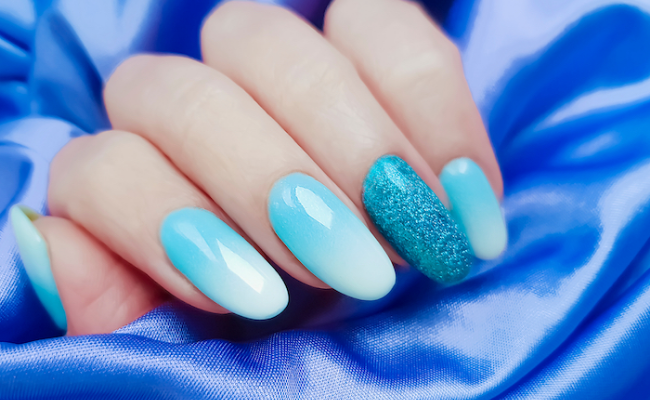
Gradient or Ombre Nail Art DIY Idea
Ombre nails made a quiet buzz some time back and have gradually emerged as an immortal pattern. In case you’re searching for nail art home plans that appear as though you’ve walked fresh out of an expert mani-pedi store, then, at that point, this is the place where you start. Also, picking various shadings each time you attempt this plan offers incredible adaptability!
Detailed Instructions:
- To start with, apply a base layer of the peach or nude shade on your nails.
- On a spotless, earth-free plastic sheet, spill out the peach/naked and pink shadings directly close to one another.
- Use the toothpick to mix the two shades.
- Touch the wipe onto the shading mix. Presently delicately spot the piece of wipe on your nails.
- Clean the areas encompassing the nails using a cotton swab dunked in nail polish remover.
- Apply the last top layer of clear polish.
Dual Tone Nail Design Idea
This design is one of the most loved art because it is stylish and classy. You can wear it to dates, or even busy working, making you look effortlessly fashionable. You don’t have to have long nails to give this a shot. In actuality, it is an incredible choice for evaluating nail art Design at home for short nails.
Detailed Instructions:
- Start by applying two layers of black nail polish as the base for your nails.
- Permit the nail polish to dry totally.
- Remove portions of scotch tape (or veiling tape) and stick them corner to corner across your nails. Rub them down to get the video and to take out any air pockets.
- Apply a layer of gold nail clean on the uncovered segment of the nail.
- Pull off the scotch tape along the direction of the stroke of your nail polish to get a smooth line.
- Paint a complete layer of clear polish to seal and protect your nails.
Kitty Cat DIY Nail Art Design
Renowned American artist and musician Rod McKuen once said, “Cats have everything – reverence, an interminable rest, and friends just when they need it.”
The Kitty Cat nail art is an excellent method to forge your affection for your cat on your nails – cat lovers know this.
Detailed Instructions:
- Apply a base coat using clear nail polish and let it dry totally.
- Plunge the thin paintbrush in the black nail polish and paint two triangles on one or the other side of each nail.
- Associate the two triangles through a half-moon shape and paint it in. This will make the cat’s face.
- Clean the brush and plunge it into the yellow or white nail polish—paint two dabs for the cat’s eyes.
- Using only the tip of the paintbrush, draw a fine, thin line across the center point of every one of the eyes.
- Give it the ideal finishing by applying a top layer of clear nail polish to seal in the plan.
Triangle Nail Art Design
The triangle design is quite similar to a move up to the double tone nail art referenced previously. It is entirely straightforward and simple nail art at home, which you can attempt regardless of whether you’re a beginner. A definitive benefit of giving it a shot? This art barely requires some time investment and requires nothing else separated from scotch tape and nail polish!
Detailed Instructions:
- In the beginning, apply two layers of chocolate nail polish and leave it to dry totally.
- Remove a piece of the concealing tape or scotch tape and stick it from a little below the center of the nail aside. (towards the nail bed)
- Use another strip to do likewise on the opposite side.
- Press along the edges of the tape to get them and to prevent any openings.
- Apply a layer of gold nail polish in the triangle-shaped nail bed.
- For the completion, apply the last layer of clear polish.
Also Read: Solar Nails Designs.
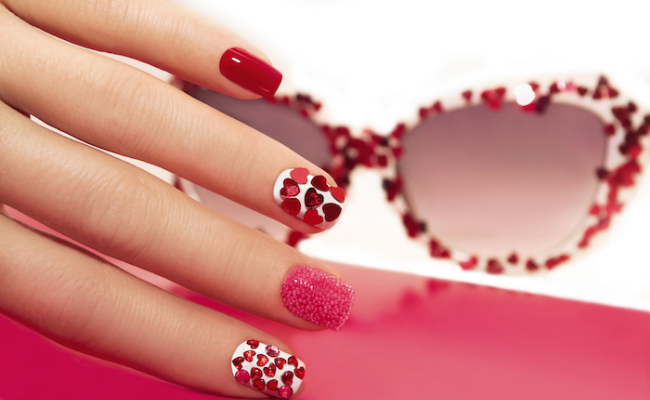
Attack of Heart Nail Art
Permit your heart to drop from your sleeve onto your nails with a delightful Attack of Heart nail design. This plan can come in exceptionally helpful, particularly when you wish to deck up for Valentine’s day.
Detailed instructions:
- Initially, apply two thin layers of white nail polish as the base for your nails.
- Using a toothpick, apply three specks of red nail polish to your nail. With the help of the sharp finish of the toothpick, interface the three dabs to create a heart.
- Make numerous hearts on a single nail, or just paint a single heart at the base of each nail.
- You can even add itemizing like a black outline or some white specks on the heart.
- When the furthest layer dries, apply a layer of clear nail polish.
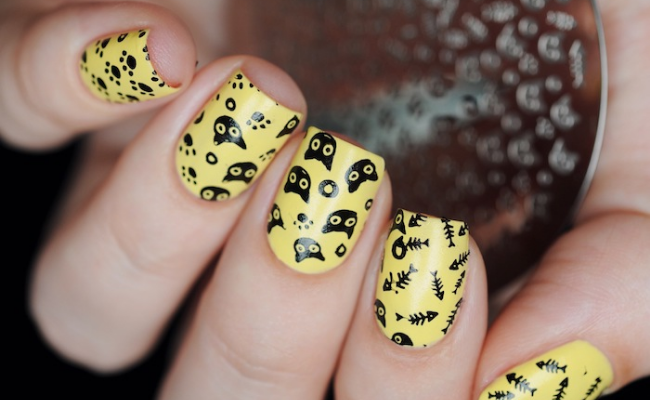
Fishnet Nail Design
The Fishnet nail art isn’t just a possibility for nail design simple at home yet additionally uses waste. In this plan, you can use the netting of your disposed of or worn-out loofah. Just dismantle it and keep the net to the side.
Detailed Instructions:
- Apply a liberal layer of black nail polish on your nails for the base.
- Pour out the silver nail polish on a perfect surface.
- When the base coat dried, hold the netting of the loofah set up.
- Touch the piece of sponge in the silver nail polish and delicately spot it on the nail, over the loofah netting.
- Strip off the loofah netting along the direction of the nail polish stroke.
- Whenever everything has dried, apply a top coat with clear nail polish.
You may also check out other many more overall ideas for Women Fashion.
Final Words
These were some of the super cute nail ideas suitable for all seasons: summers, spring, or winters. These Nail Design Ideas pictures list the very simple-to-make nail plans which will give you a salon-like nail manicure without burning to be spent. Prepare your paints ready!