


Lashes are one of the few things in life that instantly ramp up your beauty regimen. Feeling tired? Throw on a pair of falsies. Dull complexion? Time to get your tweezers and adhesive out. With the blink of an eye, the right pair of lashes can turn your whole look and confidence around!
The music is paused, the panic starts, and before you know it that halo eye you spent so much time mastering is ruined, along with the party atmosphere that has now vanished into thin air.
Well, unfortunately, false eyelashes aren’t one-size-fits-all, you can’t just head out the door, chuck some glue in your bag, and hope for the best! So, how can you apply eyelash extensions without ruining your looks?
First things first, you’ll need to gather all the materials you need. Having access to everything you need in one place, instead of scrambling looking for tools while the glue on your eyelash strip is drying out will save you a lot of hassle.
You’ll need to have your strip lashes, eyelash glue, a pair of tweezers, scissors, eyelash curlers, and mascara.
We love the look of fake lashes, but applying them? Not so much. So, determined to figure out how to apply eyelash extensions the right way? We have you covered as our tips here will help you put on those fake extensions without any hassle.
Here’s everything you need to know about how to apply false eyelashes like a pro:
Easy ways to apply eyelash extensions
- Choose the right eyelash set for your eye shape
- Trim each of the eyelash strips:
- Perfect Your Mirror Angles
- Loosen the spine of the lash strip
- Measure the lashes against your eye
- Trim any extra length off your lash strip
- Apply Glue to the Eyelash
- Wait for the Glue to Dry Slightly
- Use tweezers to place the strip along your lash line
Choose the right eyelash set for your eye shape
This is the first step of your journey to apply eyelash extensions will begin from here! While most false lash strips will fit all types of eyes, knowing your shape can help you get the placement of yours just right. There are six main shapes: monolid, upturned, downturned, hooded, round, and almond, as this video from Smashbox demonstrates.
If you have monolids (lids without a crease), you’ll want a shorter set of lashes that’s fuller at the outer corner to open your eyes up. Otherwise, you’ll want to cut strip lashes and stack leftovers at the outer edge.
Upturned eyes, or eyes that are lifted higher at the outer corner than the inner corner, and downturned eyes (which slope downward at the outer corner) also benefit from more volume at the outer edge. Think of these types of sets as the cat eyes of false lashes.
Trim each of the eyelash strips
First of all, start with some inexpensive lashes with this one because you may have a heart attack after purchasing some silky mink sets.
Measure the strip against your actual eyelid and trim off the excess. You can use the extra bit to later stack upon the lash strip at your eye’s outer corners for extra room if you want, or you can use it when you just want a bit more emphasis on top of your natural outer lashes, like a dress’s train.
Perfect Your Mirror Angles
When applying fake eyelashes, you may be inclined to look straight ahead into a mirror—especially if you’re in your bathroom or sitting at a vanity. Instead, grab a hand mirror and look down into it to help give you a better view of your natural lash line. You need to get as close to your lash line as possible to glue on eyelashes correctly.
Loosen the spine of the lash strip
In order to size the lashes and to get them to fit the curvature of your lash line, you’ll need to soften up the strip first. Otherwise, you risk the lashes popping up at the inner and outer corners when you go to glue them down.
This will help give the lash strip some extra bend and let you gauge if it needs to be loosened up further.
If the spine has a hard time staying wrapped around your finger. You can also run your fingernail over the spine like a curling ribbon to give the strip more bend. Again, the key here is to be as gentle as possible so you don’t accidentally damage any of the individual lashes. With these lashes try wearing long party dresses for women
Measure the lashes against your eye
Using your fingers, rest the lash strip along your lash line to see if you’ll need to trim it down. The strip should start where most of your natural lashes begin. If it’s too close to the inner corner of your eye, it’ll have trouble staying on and it can irritate your eyes.
To determine where they should end, count about two to four lashes inward from the edge of your outer counter. If there’s any overhang, it can make your eyes look droopy.
Trim any extra length off your lash strip
Using a pair of lash scissors, cut the spine from the outside—not the inside. Lashes are specifically made with extra length on the outer ends, so don’t worry that you’ll lose volume.
If you want to make application even easier, once you trim the edges off, you can also cut your lash strip into quarters. This helps prevent pop-ups by letting you secure each section more snuggly to your lash line.
Apply Glue to the Eyelash
Using a tweezer, hold the lashes and dab on a thin line of glue to the lash band with a cotton swab.
Avoid squeezing the glue from the tube directly onto the lash base. I put a drop of glue on the middle of a Q-tip and drag the lash through it. This adds just the right amount.
A note on color: dark glue will blend into your eyeliner better. Black glue is the best choice since it blends right into the lashes. But worry not: the standard white stuff will dry clear, so you’ll be fine. Duo Eyelash Adhesive comes in black and clear.
Wait for the Glue to Dry Slightly
This is a game-changer: Let the glue dry for about 30 seconds. It’ll make the fake lashes less likely to slide around when you apply. It’s important to wave the lash around for a bit after adding the glue. This will let the formula dry enough to become tacky, preventing you from getting glue all over the place.
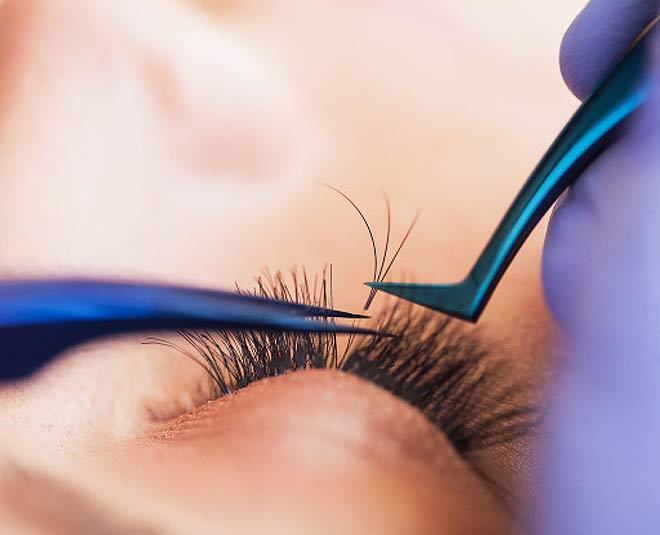
Use tweezers to place the strip along your lash line
As mentioned above, you want the beginning of the lash strip to line up with where the bulk of your natural lashes starts. Use tweezers to first place the middle of the strip in the center of your eye, then nudge the outer and inner corners down along your lash line.
Once all the edges are in place, you can use your fingers to gently pinch your natural lashes and false lashes together so they’re blended. The goal is to make sure there’s no gap between the lashes and your lash line. Till now you would have become a pro in this, now you can makeup like a pro too.
Final Words
False eyelashes are a fun, simple way to mix up your normal style and bring more attention to your eyes. Though it may take you a couple of tries to get down, applying false lashes is incredibly easy and should only take a few minutes once you get the hang of it. So, take the help of these steps and apply eyelash extensions without any spills and spoils!